Welcome back to our comprehensive guide on How To Be A Master Chef for beginners and food enthusiasts! In today’s posts, we’ll go over various kinds of cuts, what their names are and how to execute them in the kitchen! If you’ve ever wanted to be a master chef, the time is now, so let’s get started!
Learn Basic Knife Skills & How To Use Your Knife Like A Chef!
Chopping, Slicing, Dicing, & More

Over the course of this section, we will show you how to prepare your herbs, meats, fruits, and veggies. You will no longer have to wonder what a recipe means when it asks you to mince, dice, chop, slice, or julienne! After reading this section, you will be able to break down your farm-fresh foods with ease!
Chopping & Mincing
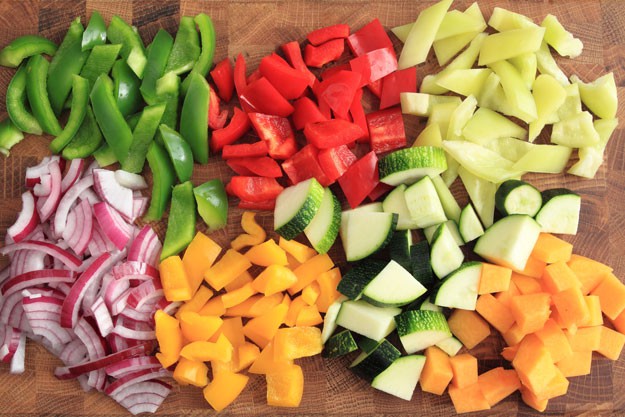
When you need to chop your food, you will have to use your Chef’s Knife to cut up the food into pieces. The pieces don’t need to be the same size, but recipes typically ask you to chop the food coarsely or finely, giving you an idea as to how big the pieces should be. Mincing is just another word for chopping. Most of the time, you will be told to do this to your herbs and vegetables.
When you have to chop something, start out by cutting the food into thin strips. After doing this, cut the strips across. Make sure to rock the blade back and forth while applying pressure to it. Most people grip the handle with one hand and use the other hand to apply the pressure.
Julienning
This sounds much harder than it is, but when you julienne your veggies, they’re absolutely gorgeous! You’re just going to take the vegetable, so that it is flat on all sides and slice it lengthwise to make pieces that are 1/8-inch thick.
Cubing & Dicing
Cubing is even easier than julienning. Start out by trimming all of the sides, making the sides flat. Then cut lengthwise and slice off the desired thickness. Stack these slices and cut them vertically. Then you will cut them across to make even cubes.
Slicing
When slicing, you must remember that if you are slicing a hard, round vegetable, you have to trim one side of it to make sure it stays in place. Don’t forget to take your time! This is not a race! You want all of the pieces to be the same thickness and by taking your time, you have a better chance at making accurate cuts. Slicing is performed by cutting straight down or at a slight angle, making sure the blade is moving away from you if you are cutting at a slight angle.
Carving Roast, Poultry, Lamb, & Ham

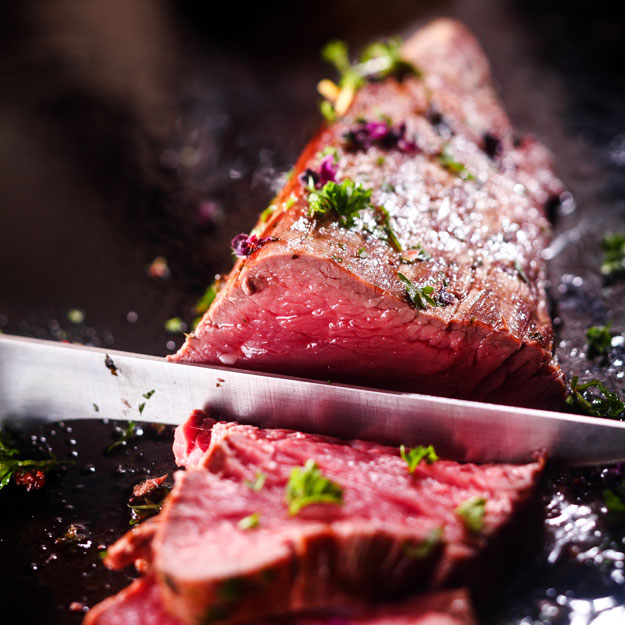
Cooking large pieces of meat is a major part of being in the kitchen. If you are cooking for other people, you probably won’t solely cook pasta and veggies every day; you’re going to need to cook up some protein! If you end up cooking a whole turkey, leg of lamb, ham, or chicken, you will have to be able to cut up the meat after it is cooked. This section shows you how to do this.
Poultry
Whether it is a turkey or a chicken you are cooking, follow these steps to cutting up your poultry:
- First, place your bird with the breast side up on your carving board.
- Next, remove a leg by cutting through the part that touches the breast.
- Pull this leg off and cut through the skin between the leg and body, so you can cut through the joint.
- Take the drumstick off of the thigh by placing the drumstick and thigh with the skin down.
- Cut the strip of yellow fat found in the center and you should be able to cut through the joint.
- Next, remove the wing from the same side. Make sure to make your cut as close to the breast as you can. There is a joint that you will need to cut through there.
- Now you can carve the breast. Start slicing halfway up the breast, making sure to slice as thin as you can. Slice parallel to the center bone and start higher every time you slice.
Now you can repeat this process on the other side of your bird.
Carving Your Meat
Carving up leg of lamb is relatively simple and only requires 4 easy-to-follow steps and a chef’s knife:
- First, cut a narrow wedge out of the leg.
- Next, begin carving the meat from either side of the wedge. Make sure to carve to the bone.
- After this, you will slice through your cuts to create pieces.
- The last step is turning the leg over to trim the fat off and carve the rest of the meat. Carve these slices parallel to the bone.
Ham is relatively simple to carve as well. When carving your ham, you want to make sure that you are slicing very thin. Chunked ham is not good to serve, but rather is better to toss in soup or stew for flavoring. We recommend that you use either a Serrated Knife or a Chef’s Knife to carve your ham.
Cutting a pot roast is also easy to do. There is only one rule when doing this: Make sure to cut against the grain to avoid shredding the meat. All you have to do is cut off the slices according to your desired thickness.
Don’t miss the series; catch the rest of our guides below:
Chapter 1: Be A Master Chef in 10 Days
Chapter 2: Kitchen Storage Ideas
Chapter 2.1: Main Kitchen Appliances
Chapter 2.2: Creating a Safe and User-Friendly Kitchen
Chapter 2.3: Essential Pots, Pans and Cookware
Chapter 3: How To Organize and Stock Your Kitchen Pantry
Chapter 4: How To Buy and Use Your Kitchen Knives
Chapter 4.1: Knife Cuts – Chopping, Dicing and More
Chapter 5: How To Steam, Boil, Poach and More
Chapter 6: How To Saute and Make Homemade Sauces
Chapter 7: How To Braise Meat and How To Make Stew
Chapter 8: How To Roast Meat, Veggies and Poultry
Chapter 9: How To Grill Steak, Chicken and Veggies
Chapter 10: How To Bake Goods and Desserts From Scratch
Chapter 10.1: How to Make Pie Crust, How To Bake Cakes and More!
Chapter 11: Cooking for Beginners – Breakfast
Chapter 11.1: Breakfast Bread – How To Make French Toast, Pancakes & Waffles
Chapter 13: How To Cook Perfect Pasta and Hearty Grains
Chapter 14: How To Make Sauces From Scratch
Chapter 15: Easy To Make Homemade Desserts For Beginners
Chapter 16: How To Make Single-Pot Recipes From Scratch
Chapter 17: Thinking Like A Chef – Cooking Tips for Beginners
Don’t forget to catch the next part of our guide to How To Be A Master Chef In 10 Days! We love hearing your feedback and comments, so let us know if you have any other tips for beginner cooks or your thoughts on this series. HomemadeRecipes.com was founded to create an online community where foodies, epicureans and chefs can share recipes and learn new ones! We need your help, however, in creating this community where you can come, share and learn. If you love to cook, love food or have some great recipes and ideas you’d like to share with us, shoot us an email and make sure to stay in touch on Facebook, Twitter, and Pinterest! We’re always looking for contributors and want to hear from you.
Sign up for our daily newsletter here!
Do you have Instagram? Don’t forget to follow @HomemadeRecipesOfficial.
Click here to Like Us on Facebook.
Click here to Follow Homemade Recipes on Pinterest
Leave a Reply