Pre-made pie crusts might make baking easier, but they can’t compete with the taste and texture of homemade dough. A real pie crust should be crisp yet tender, buttery but not greasy. The secret is using cold ingredients, handling the dough gently, and following a few key techniques. This guide covers how to master the basics of pie dough, including getting the perfect texture and avoiding common pitfalls. Once you try this recipe, you’ll never go back to packaged dough again. Now let’s get rolling!
Why Master Baking a Pie Crust? 🍰
A homemade pie crust will improve the overall quality of your pies. It has better texture and a richer taste that doesn’t have artificial ingredients. Unlike pre-made options, you can control how flaky or tender your crust turns out. You can also customize it to fit any recipe ranging from buttery dessert crusts to savory shells.
What You’ll Need 🛒
- 2 ½ cups all-purpose flour
- 1 teaspoon salt
- 1 tablespoon sugar (for sweet pies; skip for savory)
- 1 cup (2 sticks) unsalted butter, cold and cubed
- 6-8 tablespoons ice water
Optional Add-Ins
- ½ teaspoon cinnamon (for a subtle warmth in sweet pies)
- 1 teaspoon vinegar or vodka (for extra flakiness)
Here’s a step-by-step guide to flaky perfection:
1. Keep Everything Cold ❄️
Temperature matters when making pie crust. When the butter stays cold, it creates steam pockets in the oven that results in that irresistible flakiness. So, chill your ingredients—yes, even the flour.
2. Mix Dry Ingredients First 🥄
In a large bowl, whisk together the flour, salt, and sugar. Ensuring even distribution of the ingredients gives each bite balanced flavor. Conversely, some areas could be saltier or sweeter than others without proper mixing.
3. Cut in the Butter 🧈
Now, add cold, cubed butter to the flour mixture. Then, use a pastry cutter, fork, or fingertips to mix until you see coarse crumbs with pea-sized butter chunks. These pockets of butter will create steam and make the crust flaky. However, avoid overmixing or the crust will turn out dense.
4. Slowly Add Ice Water 💦
Pour in the ice water one tablespoon at a time while gently stirring the mix with a fork. Stop once the dough starts coming together. If it feels too dry, add another tablespoon. Too much water makes the dough tough, while too little makes it crumbly.
5. Shape and Chill the Dough 🛑
Once the dough holds together, form it into a disc. Wrap it in plastic wrap and refrigerate for at least 30 minutes. This helps relax the gluten and makes the dough easier to roll out. Skipping this can cause the crust to shrink in the oven.
6. Roll Out the Dough Like a Pro 🎯
Lightly flour your surface and rolling pin, then roll the dough from the center outward. Then, turn it slightly after each roll to prevent sticking. If it starts cracking, let it sit for a minute to soften. Rolling too hard can make the crust dense.
7. Transfer Smoothly
Carefully drape the dough over your rolling pin, then unroll it into the pie pan. Avoid stretching it, or it will shrink as it bakes. If a tear happens, don’t panic—just patch it with a small piece of dough.
8. Crimp, Dock, and Chill Again ❄️
Trim the edges and leave about half an inch extra. Tuck them under and crimp using your fingers or a fork. Before baking, chill the crust for 15 minutes.
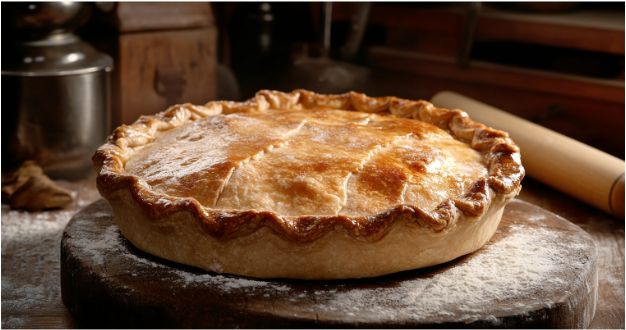
9. Bake to Perfection 🔥
For a fully baked crust, preheat your oven to 375°F. While waiting, line the dough with parchment paper and fill it with pie weights or dried beans. Bake the crust for 15 minutes, remove the weights, then bake another 5-10 minutes until golden brown.
10. Final Touches✨
Before baking, give your crust a little extra love. These small details make a big difference.
- Want a golden finish? Brush with egg wash (1 egg + 1 tbsp water).
- Craving extra crunch? Sprinkle sugar on sweet pies or flaky salt on savory ones.
- For a flakier texture, brush the crust with milk or cream.
Troubleshooting: No More Pie Crust Disasters!
Even experienced bakers run into problems. Here’s how to fix the most common ones:
Problem: Dough is too tough
👉 Solution: Use less water and handle it less.
Problem: Crust shrinks in the oven
👉 Solution: Don’t stretch it in the pan. Always chill before baking.
Problem: Soggy bottom
👉 Solution: Blind bake, use a metal pan, and bake on the lower oven rack.
Ready to Bake Like a Pro? 🎉
There you have it—the secret to homemade pie crust success! Whether you’re making an apple pie, a savory chicken pot pie, or just sneaking bites of raw dough (no judgment), these tips will help you master the art of making pie crust. If you try this recipe, let me know how it turns out! I’d love to see your flaky creations. 🥧💛
FAQs: Homemade Pie Crust Edition 🥧
- Why does my pie crust turn out tough?
Too much handling or water. Keep everything cold and mix gently. - How do I prevent a soggy bottom?
Blind bake the crust or bake on the lower oven rack. - Can I use salted butter instead of unsalted?
Yes, but reduce the added salt in the recipe. - What’s the best way to roll out pie dough?
Use a lightly floured surface and roll from the center outward. - How long can I store unbaked pie dough?
Up to 3 days in the fridge or 3 months in the freezer. - Can I make pie crust without a pastry cutter?
Yes! Use two forks or your fingers to cut in the butter. - How do I fix cracks in my dough?
Patch them with extra dough and press gently to seal. - Should I chill the dough before rolling?
Absolutely! At least 30 minutes to prevent shrinkage. - What’s the secret to an extra flaky crust?
Use cold butter and avoid overmixing the dough. - Can I make pie crust in a food processor?
Yes, but pulse gently to avoid overworking the dough.
Leave a Reply