Spring isn’t just about blooming flowers and warm breezes—it’s also the season for fresh starts! If your pantry is overflowing with expired cans, forgotten snacks, and mystery jars, now’s the time to reclaim that space. This guide will walk you through a simple spring cleaning process to declutter, organize, and refresh your space. By the end, you’ll have a functional, organized haven perfect for meal prep and spring recipes. So grab some storage bins and let’s dive in!
🌟 Step 1: Take Everything Out
Yes, everything. Emptying your pantry might seem daunting, but trust me, it’s worth it. This is your chance to see what you’ve got and what you’ve forgotten. A successful spring cleaning starts with clearing out all the clutter, so pull everything out, pile it on the counter, and then start sorting.
🚨 Step 2: Toss the Expired Stuff
We’ve all been there—keeping that jar of cinnamon that expired three years ago because “It smells fine!” Well, let’s not do that anymore. Check the expiration dates on everything. Spices lose their potency after about a year and old canned goods? Not worth the risk. If it’s expired or smells funky, toss it. For unopened or non-expired items you know you’ll never use, you can donate them to a local food bank.
🧹 Step 3: Wipe Down Those Shelves
Now that your pantry is empty, grab a damp cloth and some mild cleaner. Wipe down the shelves and pay attention to crumbs and sticky spots. You’d be surprised how much fresher it feels when your shelves are sparkling clean. Spring cleaning isn’t just about tidying up—it’s about creating a fresh, inviting space for your food. While you’re at it, consider adding non-slip liners to help keep things neat in the long run.
🗂️ Step 4: Group Like Items Together
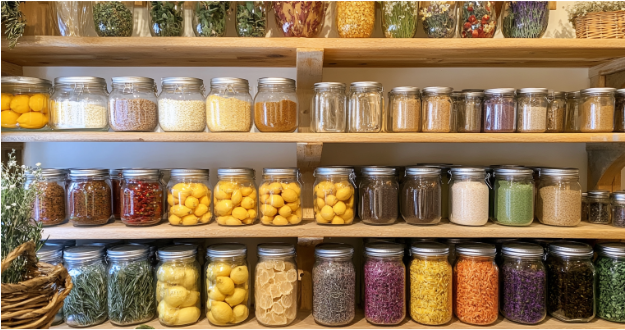
Here’s where the fun starts—reorganizing your items by category. Place snacks in one group, baking supplies in another and spices all together. This makes it easier to find what you need when you’re cooking. If you’re a fan of clear bins or baskets, now’s the time to use them. They keep everything neat and allow you to see what you have at a glance.
📋 Step 5: Create a Pantry Essentials Checklist
Once you’ve organized your pantry, you might notice some missing essentials. Here’s a handy list of pantry staples:
- Baking Supplies: Flour, sugar, baking powder, and vanilla extract.
- Canned Goods: Tomatoes, beans, and coconut milk.
- Spices and Herbs: Dill, basil, cinnamon, and smoked paprika.
- Dry Goods: Rice, pasta, quinoa, and breadcrumbs.
- Snacks: Nuts, dried fruits, and granola.
🌼 Step 6: Rotate and Label
When putting everything back, follow the “first in, first out” rule. Older items should go in front and newer ones behind. This helps you avoid wasting food. Additionally, label containers and jars properly to make it easier finding them later.
🥗 Step 7: Make It Spring-Ready
Spring recipes are all about light, fresh ingredients. Stock up on items like olive oil, vinegar, and citrus for quick dressings. Keep onions, garlic, and potatoes on hand as they pair well with fresh produce.
If you love baking, you can actually store fun ingredients like lemon zest or lavender to your pantry. They bring a touch of spring to cakes, cookies, and even cocktails!
🕶️ Bonus Tips for Staying Organized
Once your pantry is picture-perfect, keep it that way with these habits:
- Do a quick inventory before grocery shopping.
- Label shelves to remind everyone where things go.
- Set a reminder to deep clean the pantry every three months.
🌷 Final Thoughts
Spring cleaning your pantry isn’t just about getting rid of the old things; it’s about making space for the new ones. With a clean, organized pantry, cooking feels less like a chore and more like a joy. Plus, you’ll waste less food and save money in the long run. So put on your favorite playlist, grab a cup of coffee and give your pantry the TLC it deserves.
Happy spring cleaning, y’all! 🧹✨
FAQs: Spring Cleaning Your Pantry
- How often should I clean my pantry?
Every three to six months for best results. - What’s the best way to clean pantry shelves?
Use a damp cloth with mild cleaner or vinegar solution. - Should I throw away expired spices?
Yes, they lose flavor after about a year. - Can I donate unopened food?
Yes, as long as it’s not expired or damaged. - How do I prevent pantry pests?
Store dry goods in airtight containers. - What are pantry essentials for spring?
Think olive oil, vinegars, citrus, and seasonal spices like dill. - How do I organize a small pantry?
Use vertical space, clear bins, and shelf risers. - What can I use to label containers?
Chalkboard labels or masking tape work great. - What’s the “first in, first out” rule?
Place older items in front to use them first. - How can I keep my pantry organized?
Do quick inventories and stick to your system.