
Kombucha tea recipe is so tea-liciously good, but its also very healthy. This fermented tea has been consumed by people around the world for thousands of years and today we'll show you how you can make it yourself. Read on for details!

Savor the rich aroma and exquisite tea experience brought to you by the kombucha tea, and I am sure you would enjoy every sip and love the intensely good flavour of this traditional recipe.
Kombucha Tea Recipe
While there is no available scientific evidence proving the health benefits of kombucha there are many claims that that indicate otherwise. And since we personally love kombucha, we're bringing a homemade recipe, courtesy of The Kitchn, to you!
This Recipe Makes About 1 Gallon

(via Eat Drink Better, click here for full tutorial)
Supplies and Ingredients You Need:
Ingredients
3 1/2 quarts water
1 cup white sugar
8 bags black tea (or 2 tablespoons loose tea)
2 cups starter tea from last batch of kombucha or store-bought (unpasteurized, neutral-flavored) kombucha
1 scoby per fermentation jar
Optional flavoring extras for bottling: 1 to 2 cups chopped fruit, 2 to 3 cups fruit juice, 1 to 2 tablespoons flavored tea (like hibiscus or Earl Grey), 1/4 cup honey, 2 to 4 tablespoons fresh herbs or spices
Equipment
Stock pot
1-gallon glass jar or two 2-quart glass jars
Bottles: Six 16-oz glass bottles with plastic lids, 6 swing-top bottles, or clean soda bottles
Small funnel
Instructions for Kombucha Tea
Note: Avoid prolonged contact between the kombucha and metal both during and after brewing. This can affect the flavor of your kombucha and weaken the scoby over time.

(via Arbor Teas)
Step 1.
Make the Tea Base:
Bring the water to a boil. Remove from heat and stir in the sugar to dissolve. Drop in the tea and allow it to steep until the water has cooled. Depending on the size of your pot, this will take a few hours. You can speed up the cooling process by placing the pot in an ice bath.

(via The Healthy Foodie, click here for full tutorial)

(via Wikimedia Commons)
Step 2.
Add the Starter Tea:
Once the tea is cool, remove the tea bags or strain out the loose tea. Stir in the starter tea. (The starter tea makes the liquid acidic, which prevents unfriendly bacteria from taking up residence in the first few days of fermentation.)

(via Yum Universe, click here for full tutorial)
Step 3.
Transfer to Jars and Add the Scoby:
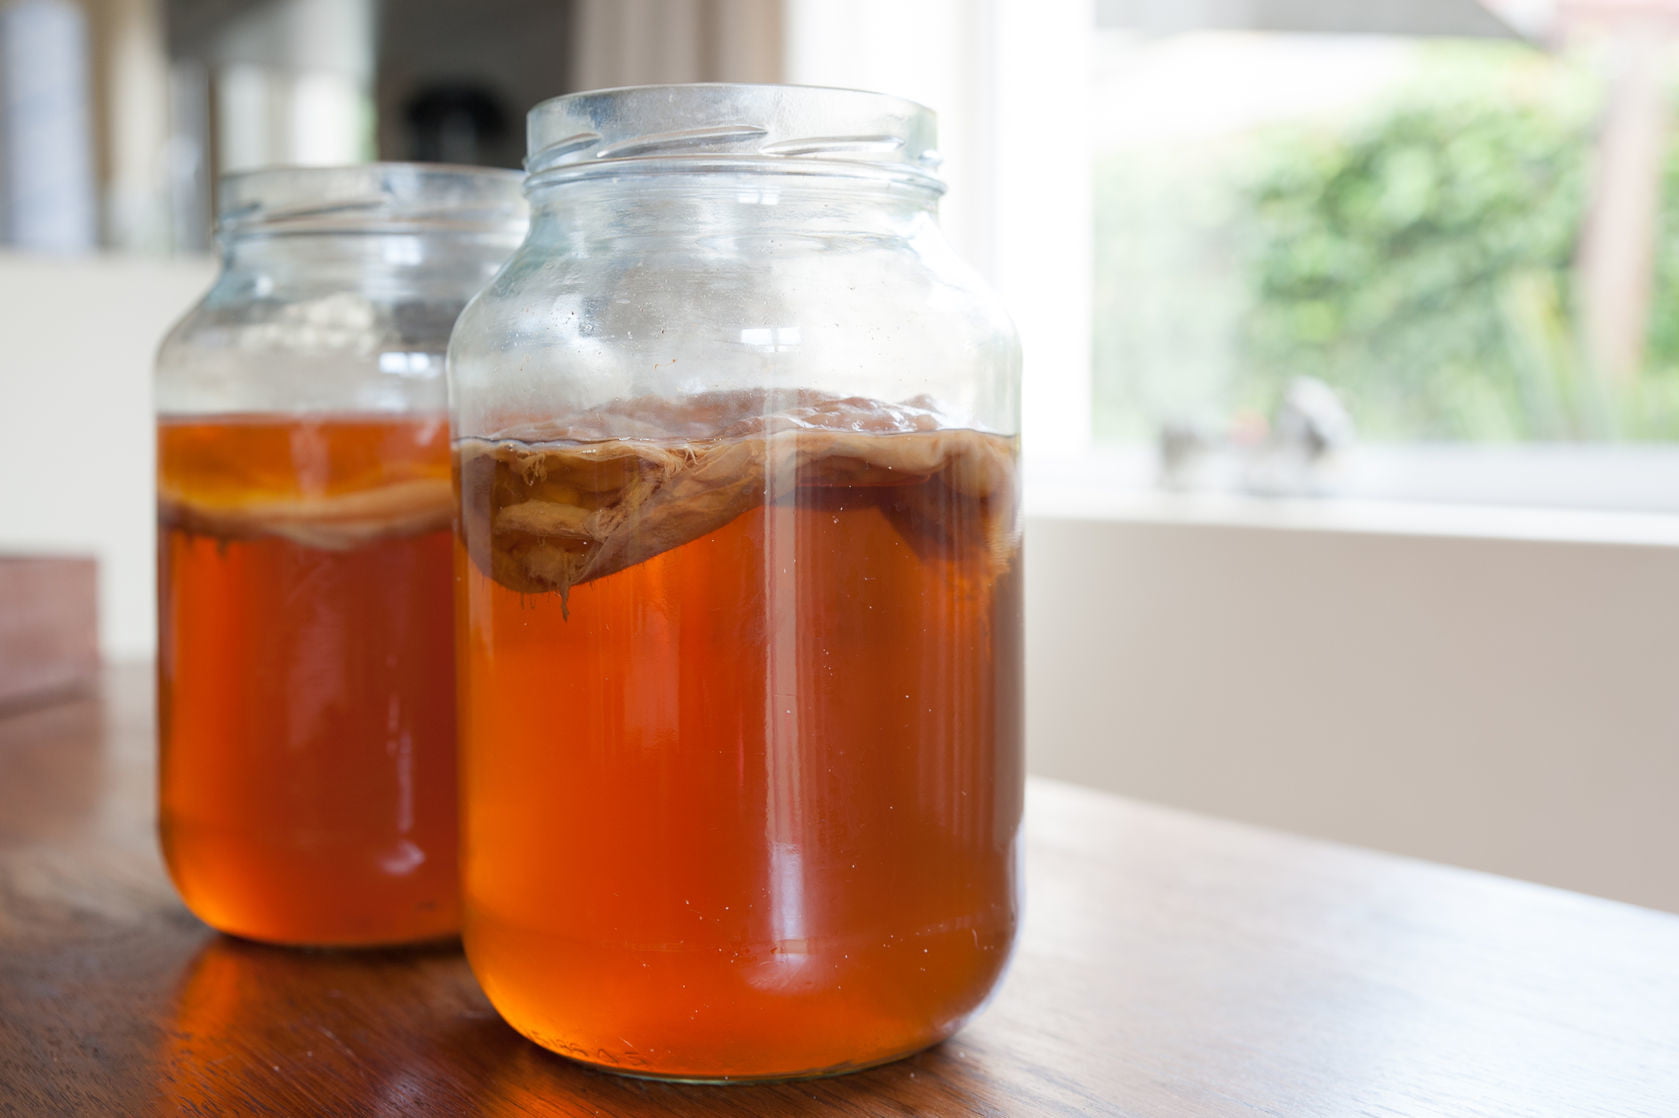
Pour the mixture into a 1-gallon glass jar (or divide between two 2-quart jars, in which case you'll need 2 scobys) and gently slide the scoby into the jar with clean hands. Cover the mouth of the jar with a few layers of cheesecloth or paper towels secured with a rubber band.

(via Yum Universe, click here for full tutorial)

(via The Healthy Foodie, click here for full tutorial)
Step 4.
Ferment for 7 to 10 Days:
Keep the jar at room temperature, out of direct sunlight, and where it won't get jostled. Ferment for 7 to 10 days, checking the kombucha and the scoby periodically.

(via Kaiku Lifestyle, click here for full tutorial)
It's not unusual for the scoby to float at the top, bottom, or even sideways. A new cream-colored layer of scoby should start forming on the surface of the kombucha within a few days. It usually attaches to the old scoby, but it's ok if they separate. You may also see brown stringy bits floating beneath the scoby, sediment collecting at the bottom, and bubbles collecting around the scoby. This is all normal and signs of healthy fermentation.
After seven days, begin tasting the kombucha daily by pouring a little out of the jar and into a cup. When it reaches a balance of sweetness and tartness that is pleasant to you, the kombucha is ready to bottle.

(via The Healthy Foodie, click here for full tutorial)
Step 5.
Remove the Scoby:
Before proceeding, prepare and cool another pot of strong tea for your next batch of kombucha, as outlined above. With clean hands, gently lift the scoby out of the kombucha and set it on a clean plate. As you do, check it over and remove the bottom layer if the scoby is getting very thick.

(via Yum Universe, click here for full tutorial)
Step 6.
Bottle the Finished Kombucha:
Measure out your starter tea from this batch of kombucha and set it aside for the next batch. Pour the fermented kombucha (straining, if desired) into bottles using the small funnel, along with any juice, herbs, or fruit you may want to use as flavoring.


(via The Kitchn, click here for full tutorial)

(via Whole Lifestyle Nutrition, click here for full tutorial)
Leave about a half inch of head room in each bottle. (Alternatively, infuse the kombucha with flavorings for a day or two in another jar covered with cheesecloth, strain, and then bottle. This makes a cleaner kombucha without “stuff” in it.)

(via Whole Lifestyle Nutrition, click here for full tutorial)
Step 7.
Carbonate and Refrigerate the Finished Kombucha:
Store the bottled kombucha at room-temperature out of direct sunlight and allow 1 to 3 days for the kombucha to carbonate. Until you get a feel for how quickly your kombucha carbonates, it's helpful to keep it in plastic bottles; the kombucha is carbonated when the bottles feel rock solid. Refrigerate to stop fermentation and carbonation, and then consume your kombucha within a month.

(via Small Notebook, click here for full tutorial)
Make a Fresh Batch of Kombucha: Clean the jar being used for kombucha fermentation. Combine the starter tea from your last batch of kombucha with the fresh batch of sugary tea, and pour it into the fermentation jar. Slide the scoby on top, cover, and ferment for 7 to 10 days.

(via Cheeseslave, click here for full tutorial)
Additional Notes:
- Batch Size: To increase or decrease the amount of kombucha you make, maintain the basic ratio of 1 cup of sugar, 8 bags of tea, and 2 cups starter tea per gallon batch. One scoby will ferment any size batch, though larger batches may take longer.
- Putting Kombucha on Pause: If you'll be away for 3 weeks or less, just make a fresh batch and leave it on your counter. It will likely be too vinegary to drink by the time you get back, but the scoby will be fine. For longer breaks, store the scoby in a fresh batch of the tea base with starter tea in the fridge. Change out the tea for a fresh batch every 4 to 6 weeks.
- Other Tea Options: Black tea tends to be the easiest and most reliable for the scoby to ferment into kombucha, but once your scoby is going strong, you can try branching out into other kinds. Green tea, white tea, oolong tea, or a even mix of these make especially good kombucha. Herbal teas are ok, but be sure to use at least a few bags of black tea in the mix to make sure the scoby is getting all the nutrients it needs. Avoid any teas that contain oils, like earl grey or flavored teas.
- Avoid Prolonged Contact with Metal: Using metal utensils is generally fine, but avoid fermenting or bottling the kombucha in anything that brings them into contact with metal. Metals, especially reactive metals like aluminum, can give the kombucha a metallic flavor and weaken the scoby over time.

(via Becoming Peculiar, click here for full tutorial)
Just a few things to remember after we send you off to ferment and brew. Check out the troubleshooting kombucha tips and pointers below!
• It is normal for the scoby to float on the top, bottom, or sideways in the jar. It is also normal for brown strings to form below the scoby or to collect on the bottom. If your scoby develops a hole, bumps, dried patches, darker brown patches, or clear jelly-like patches, it is still fine to use. Usually these are all indicative of changes in the environment of your kitchen and not a problem with the scoby itself.
• Kombucha will start off with a neutral aroma and then smell progressively more vinegary as brewing progresses. If it starts to smell cheesy, rotten, or otherwise unpleasant, this is a sign that something has gone wrong. If you see no signs of mold on the scoby, discard the liquid and begin again with fresh tea. If you do see signs of mold, discard both the scoby and the liquid and begin again with new ingredients.
• A scoby will last a very long time, but it's not indestructible. If the scoby becomes black, that is a sign that it has passed its lifespan. If it develops green or black mold, it is has become infected. In both of these cases, throw away the scoby and begin again.
• To prolong the life and maintain the health of your scoby, stick to the ratio of sugar, tea, starter tea, and water outlined in the recipe. You should also peel off the bottom (oldest) layer every few batches. This can be discarded, composted, used to start a new batch of kombucha, or given to a friend to start their own.
• If you're ever in doubt about whether there is a problem with your scoby, just continue brewing batches but discard the kombucha they make. If there's a problem, it will get worse over time and become very apparent. If it's just a natural aspect of the scoby, then it will stay consistent from batch to batch and the kombucha is fine for drinking.

(via Healthy Green Kitchen, click here for full tutorial)
That’s all folks. Did you enjoy our homemade kombucha tea recipe? Let us know in the comments section below what you thought of our homemade kombucha tea recipe. Do you have a favorite homemade kombucha tea recipe that’s been in your family for ages? Share it with us and we’ll give it a shot.
We want to share our love of cooking with the you! We need your help in creating a community of foodies where you can come and share your recipes and expect the best homemade food prepared by our team of expert chefs and food connoisseurs.
Do you have Instagram? Don’t forget to @HomemadeRecipesOfficial.
Click here to Like Us on Facebook.
Click here to Follow Homemade Recipes on Pinterest
Check out more articles below
How To Make Scoby For Kombucha Tea At Home | Homemade Recipes
12 Dreamy Latte Recipes To Keep Cozy With | Homemade Recipes